Workflow11 min read
Video ads with Claude: from storyboard to launch ready
How a video ad comes together with Claude: planning, shooting for the edit, and cutting the good takes into CapCut, Premiere, DaVinci Resolve or Meta Edits.
- Claude Code
- Figma
- Notion
- Whisper
- FFmpeg
- yt-dlp
- CapCut
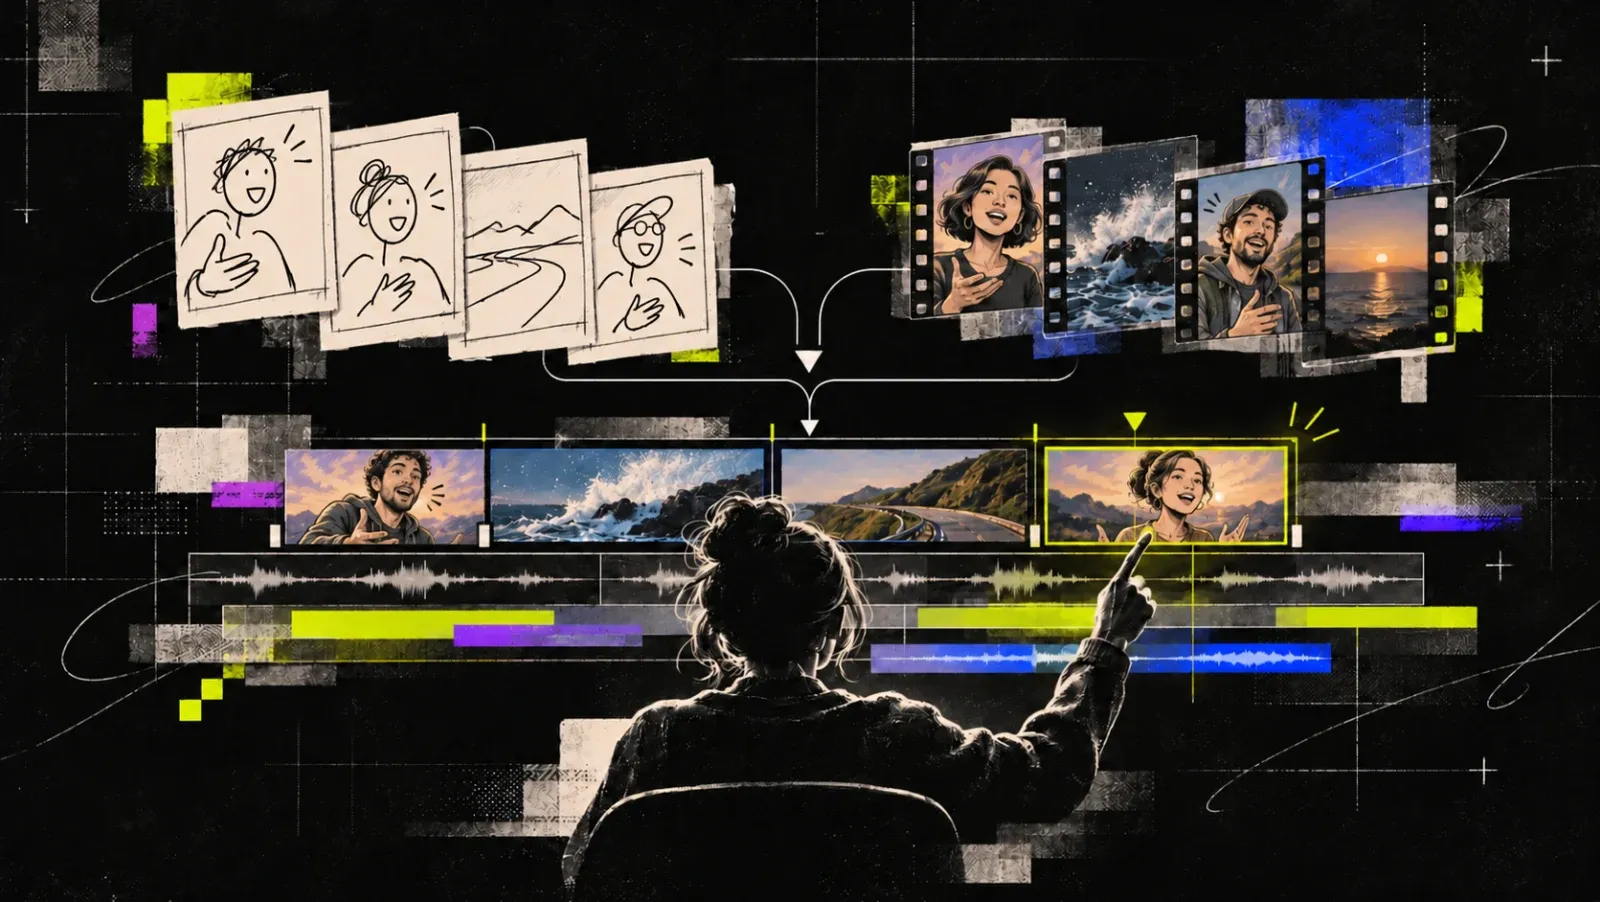 AI-generated imageMade with an AI image tool for this post.
The process at a glance
- 01PlanBatch, script and storyboard, drafted with Claude.
- 02ShootRecord in a way that makes the edit easy.
- 03Find and placeClaude cuts the good takes into a rough cut.
- 04Fine cutRhythm, music and sound design, done by hand.
Claude takes over most of the routine work. It drafts scripts and storyboards based on our ideal customer profiles, brand positioning and brand voice, finds the good takes in hours of raw footage and builds a rough cut directly in a desktop video editor like CapCut or Edits. Whether the ad is any good still comes down to the human parts, the idea, the shoot and the final cut. The steps below show where my input makes the difference and where Claude takes work off my hands.
Plan: one variable per batch
1. Starting point
A new ad usually starts with a reel we liked, an ad that already did well, or an idea of our own. When it’s someone else’s reel, I look at why it works and then write my own story around that.
For this part I built a few Claude skills on top of open-source tools, which the whole team now uses. Send Claude an Instagram link, and it downloads the reel with yt-dlp, uses FFmpeg to pull a still every few seconds into a contact sheet and transcribes the audio with timestamps. That way Claude can see and hear the reel itself, which tells it far more than the caption.
2. Batch and script
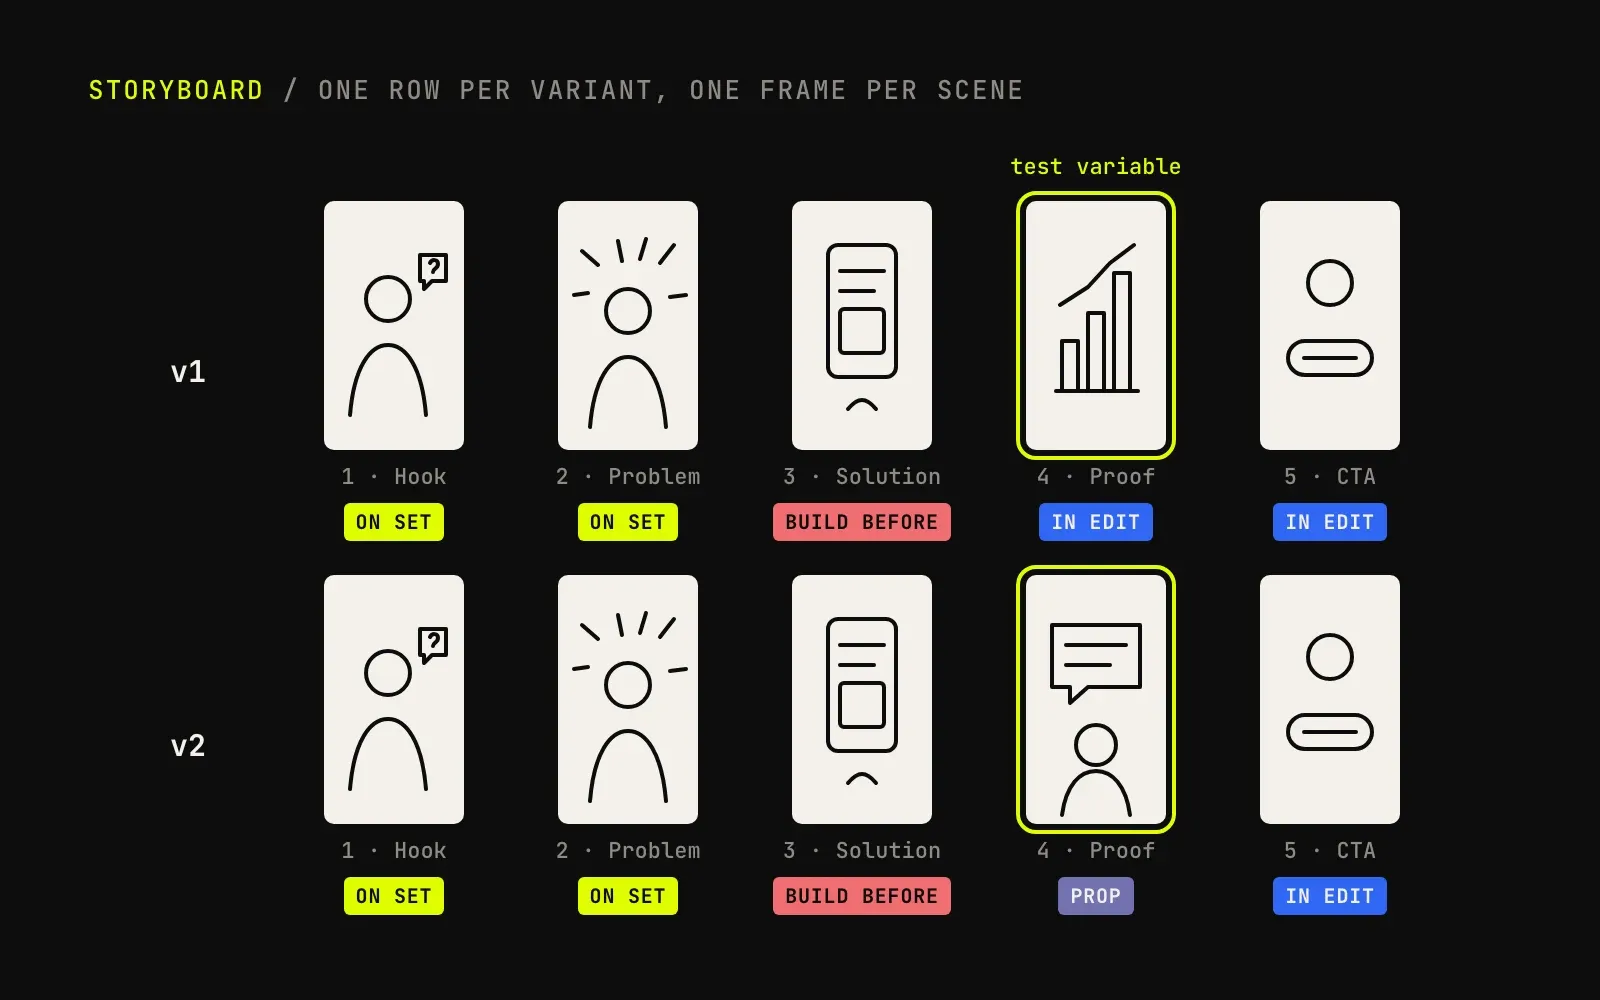
Ads are planned in batches of three or four variants, and each batch tests one thing, for example the hook or the proof. Claude walks through that setup and then writes one script per variant: hook, problem, solution, call to action. Since the variants only differ in one part, the shared parts get shot once and reused.
3. Storyboard and badges
Claude then turns the script into a scribble storyboard and places it directly in Figma through an MCP connection. Each scene gets a frame with the picture, the exact speaker text and a badge for what it needs, for example a screen that has to be built before the shoot or a graphic that gets added in the edit. That first version is rough. Then I go through it, fine-tune the hook ideas, the copy and the scripts, shorten scenes and bring in my own ideas, usually over a few rounds, until it works for the shoot and the edit and feels human.
4. One name for everything
Every variant also gets an entry in Notion and one name that says what it tests, roughly which hook, which angle and which format. That name stays the same on the storyboard, the CapCut project, the export files and the ad itself. Once the numbers are in, each result can be traced back to its storyboard.
Shoot for the edit
The shoot is still manual work. A few habits on set make the automatic edit much more reliable, though. For example, the camera keeps rolling the whole time. Shared sentences are recorded once, the sentences that change per variant two or three times each. The mic sits close to the speaker and the director stands further away, so the volume alone tells a take apart from an instruction. If the speaker is supposed to look away, someone says so out loud, otherwise that take gets thrown out later. A short pause before and after each take also makes the cutting cleaner.
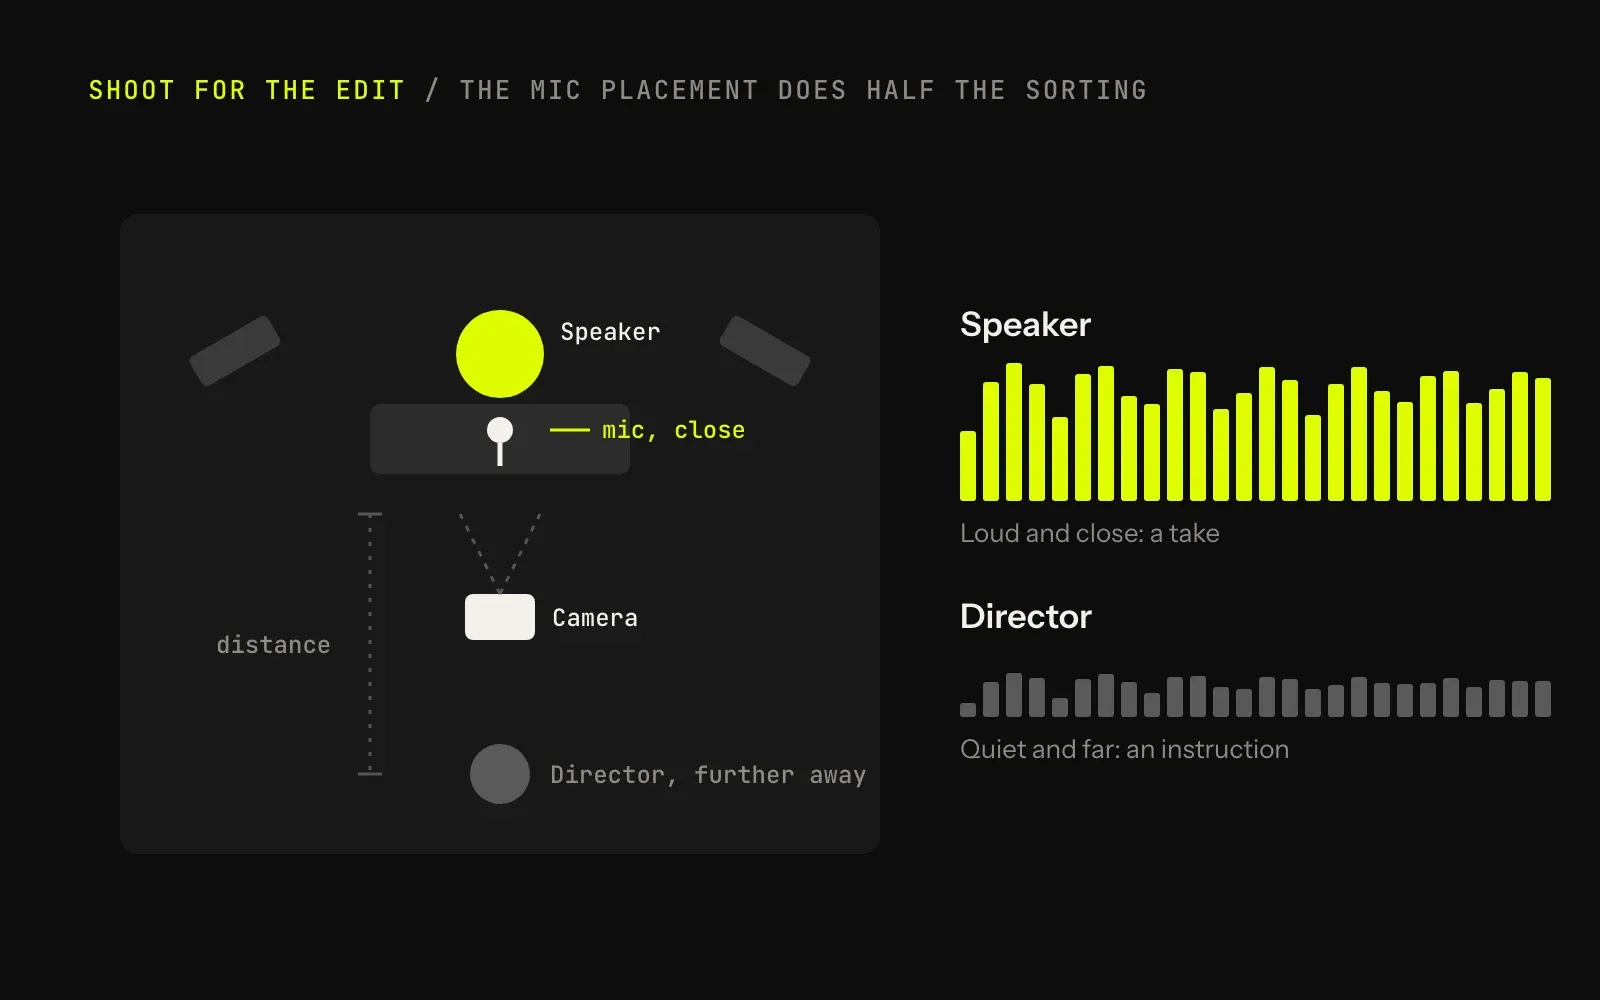
What you end up with is a handful of long raw files, one per camera.
Finding the good takes
The longest camera file from one of my shoots ran for 51 minutes and weighed over 12 GB. Somewhere in there were the two or three clean takes of each sentence I needed.
Finding them is Claude’s job, and it runs in Claude Code from a single prompt. For the first run I used a 3.5-minute test file, and the long files only followed once that result was right.
- 01ListenThe volume sorts out run-throughs and the director.
- 02TranscribeWhisper runs locally on short pieces of speech.
- 03CheckText against the storyboard, eyes on the camera.
- 04CutHalf a second of room, then transcribed again.
Claude looks at the sound first. Real takes are louder and closer than run-throughs, mumbling or the director’s voice, so the volume alone sorts out a lot of material before anything is transcribed. The right threshold depends on the mic, which is why a new setup needs a quick calibration against a few known takes.
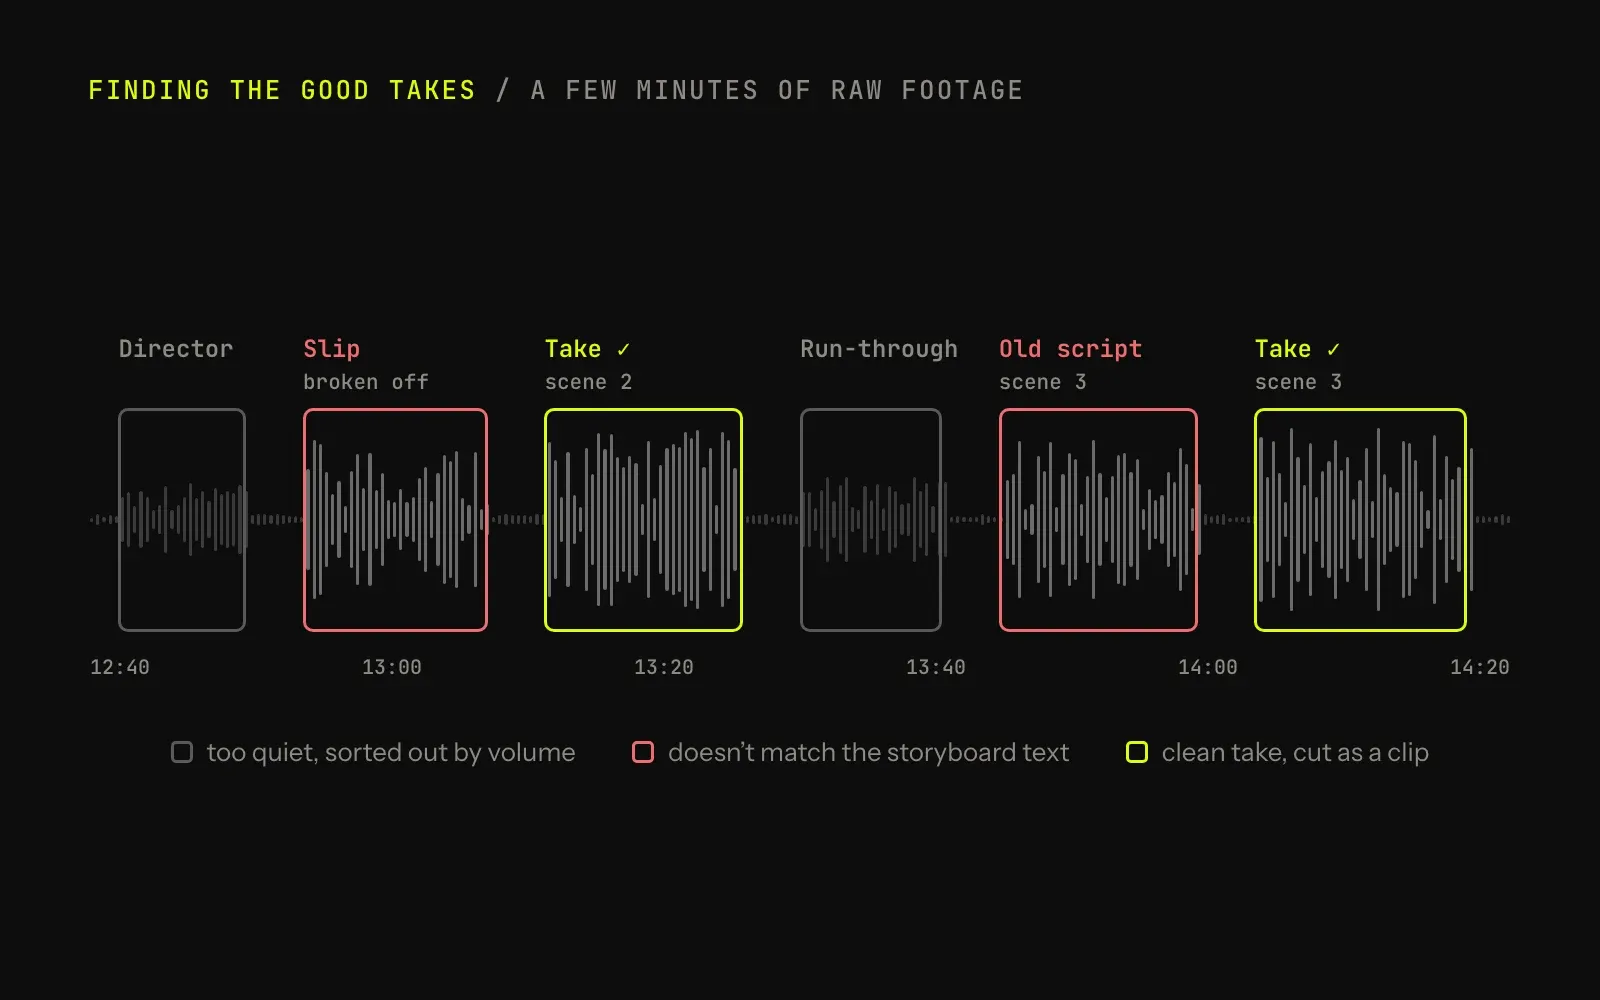
Whisper then transcribes the remaining speech in short pieces, running locally on the Mac. On a long file in one go, its timestamps drift and takes land in the wrong place. Claude compares every transcript with the speaker text from the storyboard. That tells it which scene a take belongs to, and it catches slips, old versions of the script and sentences that break off.
For the takes that are left, Claude checks the picture to see whether the speaker is looking into the camera. Glances that were announced on set stay in. Everything it throws out comes back as a list with timecodes, so I can check those spots in the original.
Each take is cut with half a second of room on both sides. The edit needs that extra bit: a transition or a J-cut needs a few frames before and after the spoken words, and without them the cut eats into the first or last syllable. If the next sentence follows closer than that, the cut lands in the middle of the pause, so no half word from the neighbouring take ends up in the clip. At the end Claude transcribes every clip again and compares it with the sentence it should contain. If the first word got clipped, it shows up right there.
Every clip gets named automatically, with a running number, a short name for the sentence and the take number:
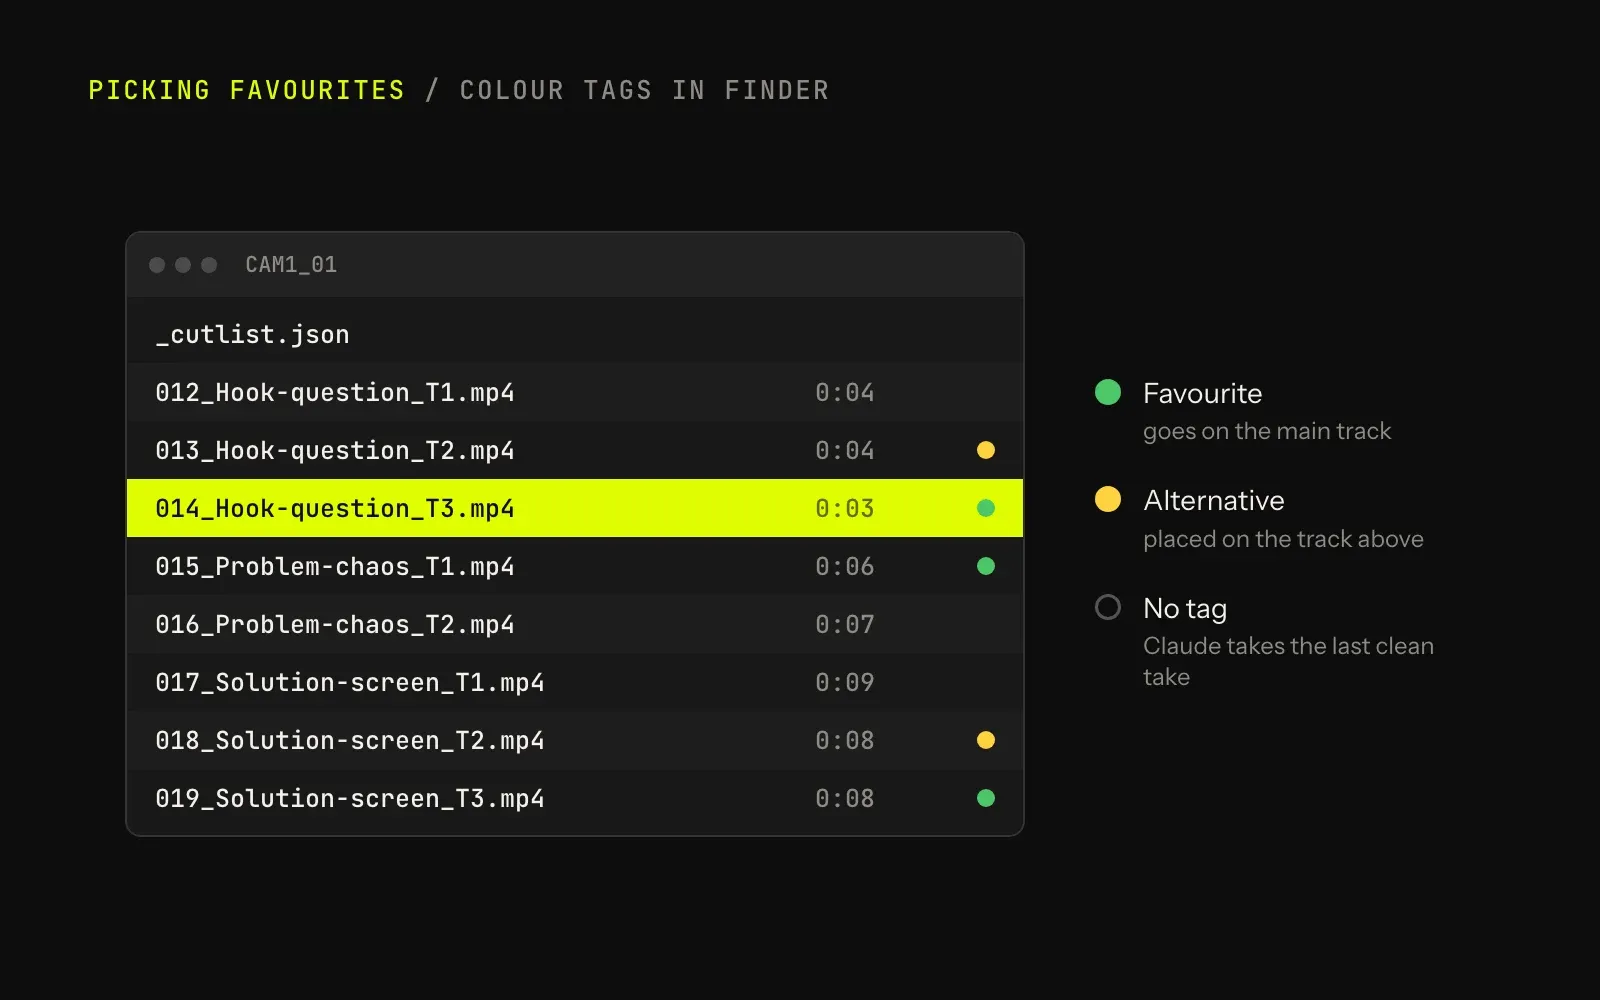
012_Hook-question_T1.mp4
013_Hook-question_T2.mp4
014_Hook-question_T3.mp4
015_Problem-chaos_T1.mp4
016_Problem-chaos_T2.mp4
Since the clips sort by sentence, the folder shows at a glance how many usable takes there are for each part of the script.
Writing straight into your video editing tool
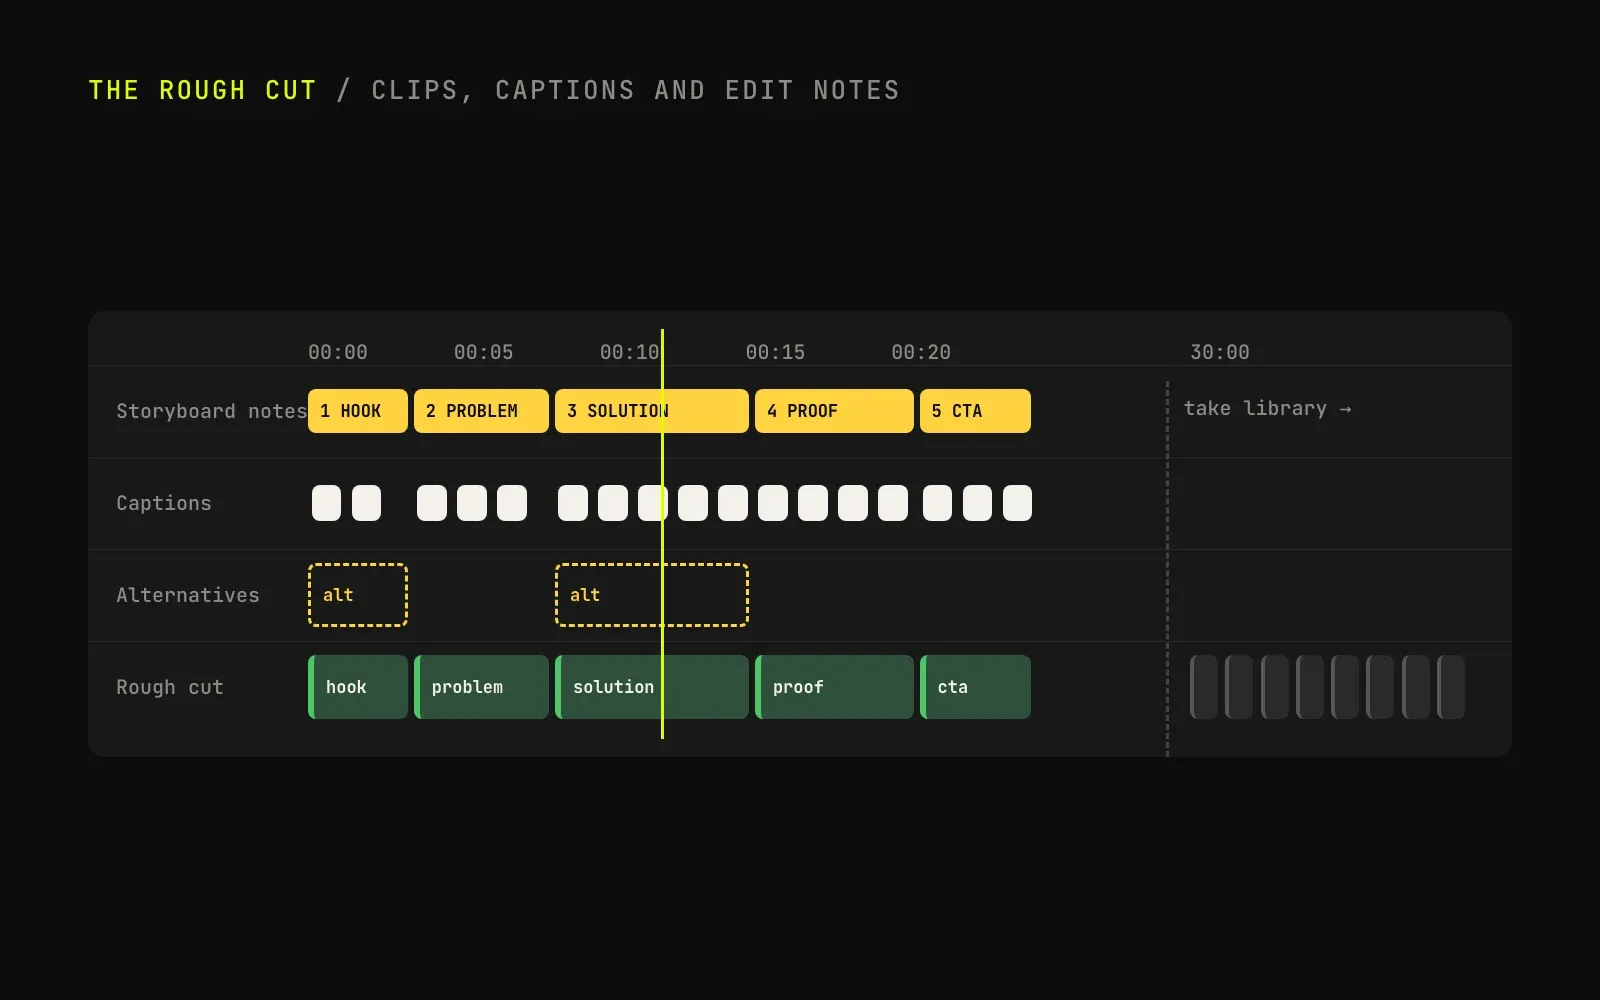
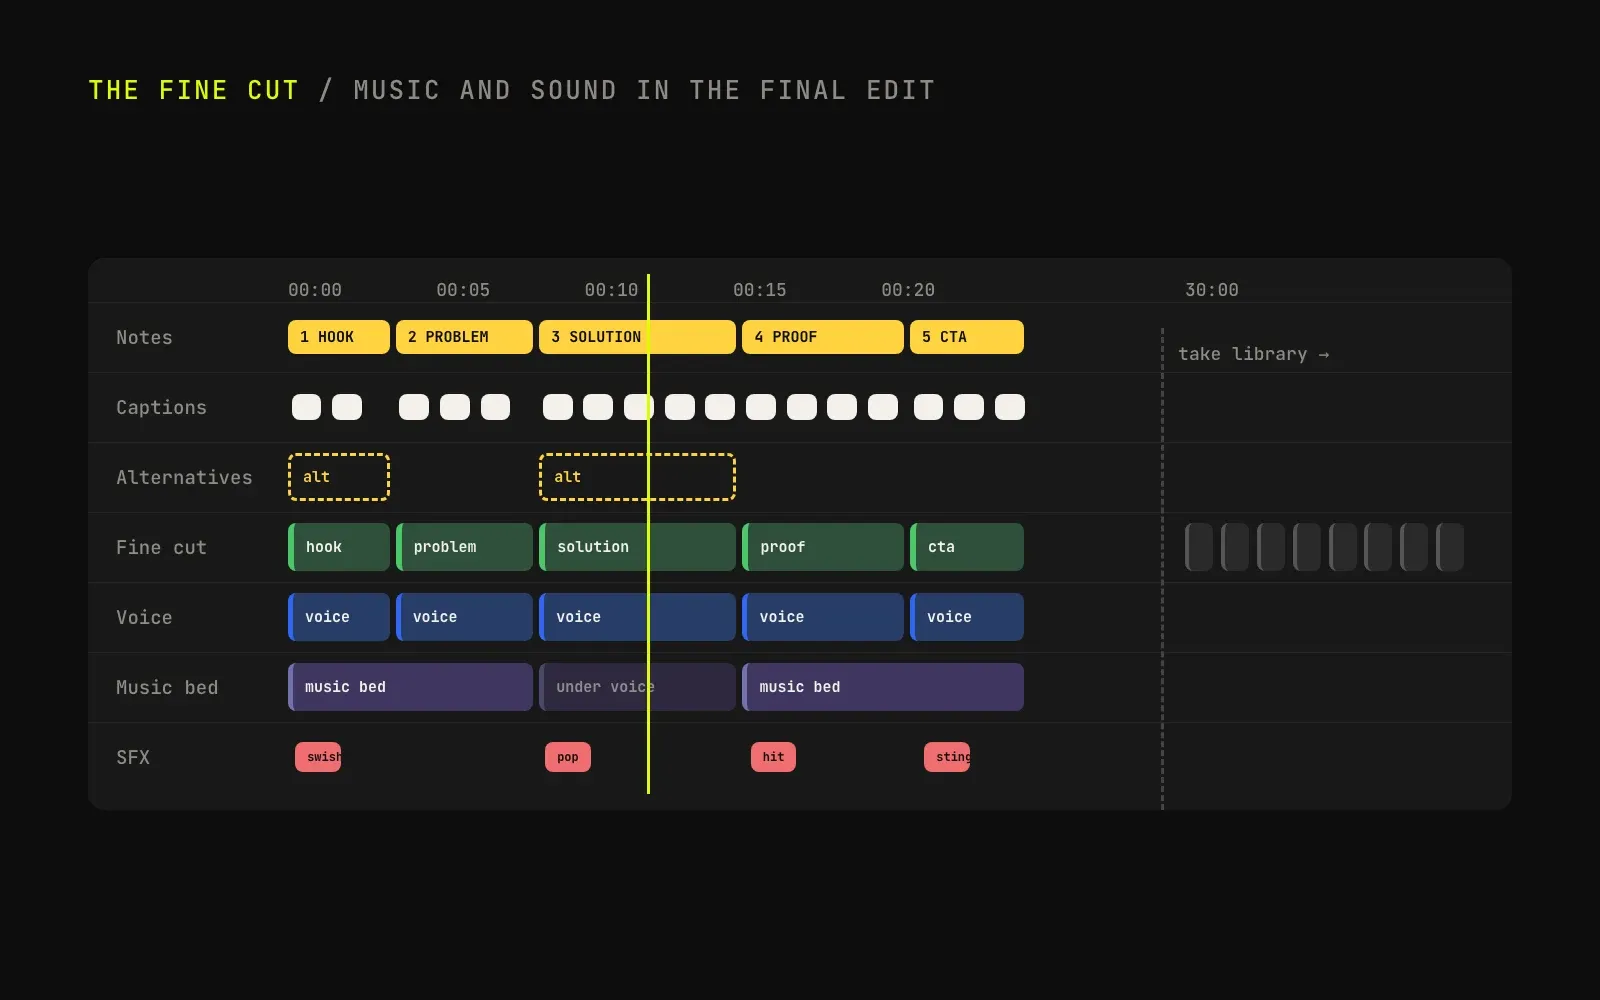
A lot of people are excited about MCP connections that let AI edit inside a video app right now, and many assumed CapCut simply can’t do that. For CapCut Desktop you don’t need an MCP at all. The app runs locally and keeps each project as a folder of files on the Mac, so Claude or Codex can read that structure and write into it directly. Each variant gets a rough cut in storyboard order, and after those comes a take library with every clip at full length, grouped by sentence. You then open the project in CapCut as usual.
The rough cut is deliberately sparse: the chosen takes are in order, captions sit underneath, and the storyboard notes show what still needs to happen in each scene. I use it as an editable map of the ad.
The same works with most editing software that runs locally and stores its projects as files. Premiere Pro projects are compressed XML, and After Effects can save its projects as XML too. Before looking for a plugin or an MCP, it’s worth letting Claude look at the project file first. Often it can write into it directly, the way it does with CapCut.
Two rules apply every time. The program has to be fully closed, otherwise it overwrites the changes the next time it saves. And nothing gets written into the original: every change runs on a copy first, gets checked, and only then goes into the real project. These formats are rarely documented, so an update can break things. CapCut on the Mac had one more catch: it runs in a sandbox, and on the first attempt it reported every single clip as missing because they were stored in the wrong folder.
Claude also needs something to build on: a brand kit, or better a template project in CapCut or whatever tool you use, with the typography, colours, safe zones and recurring elements like the logo, intro and end card already set up. Claude has no taste of its own and can’t fully judge whether something fits the style, so the design decisions have to be made beforehand, ideally right in that template. Once they’re there, Claude reuses those styles for every caption, note and clip it adds.
Picking favourites in Finder
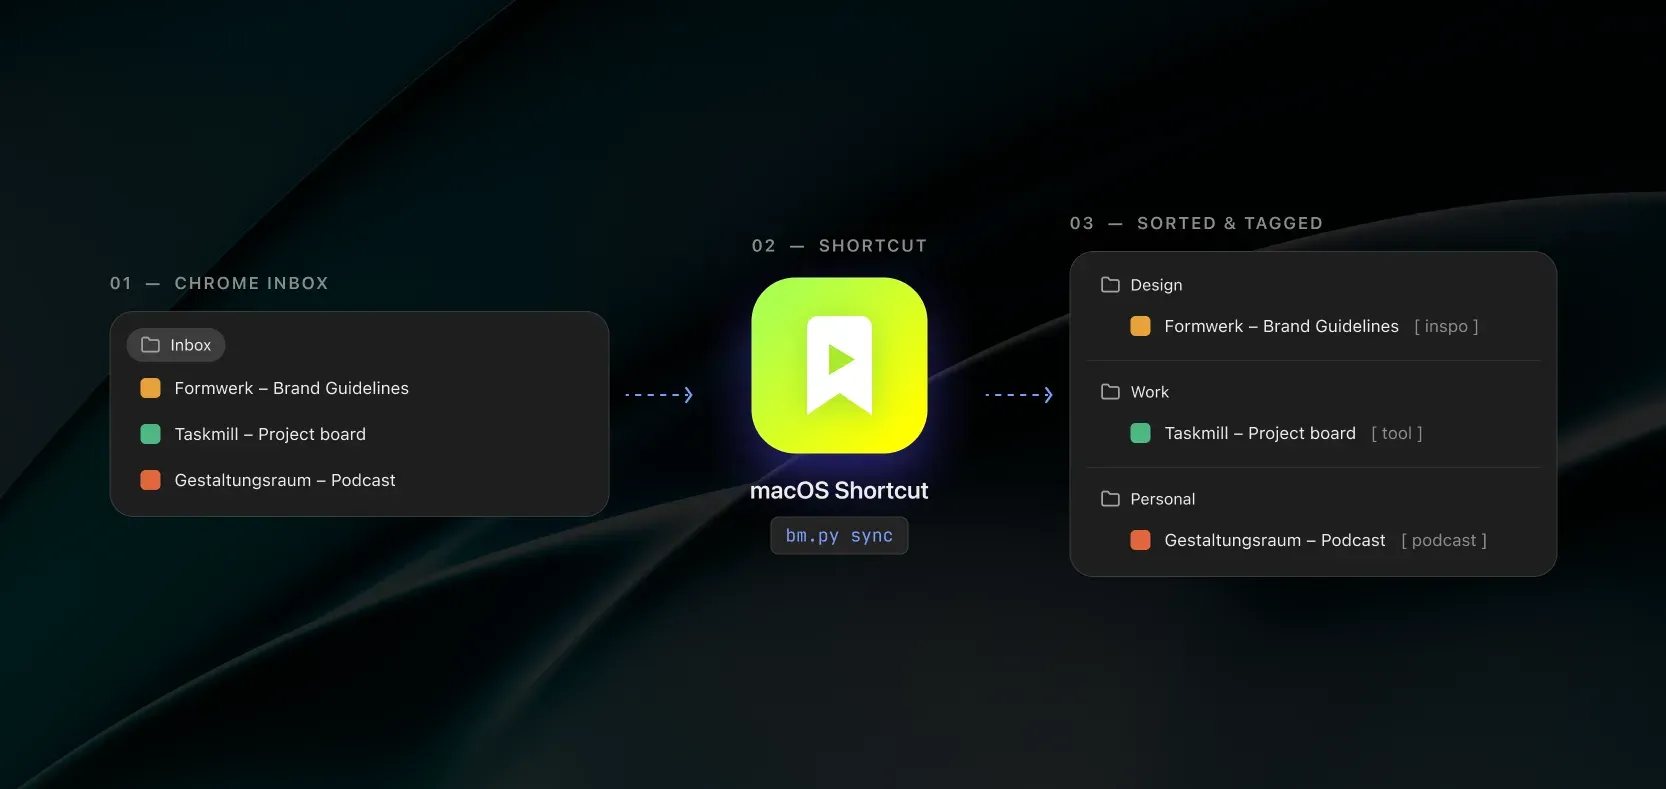
Claude finds takes that are technically clean, but which one works best is a matter of human taste. I flip through the clips in Finder with Quick Look and give my favourites a green tag, alternatives a yellow one. Claude reads the tags straight from the files and rebuilds the rough cut with the green takes on the main track and the yellow ones on the track above, ready to swap in. If two green takes compete for the same scene, it asks which one I want.
Captions and storyboard notes
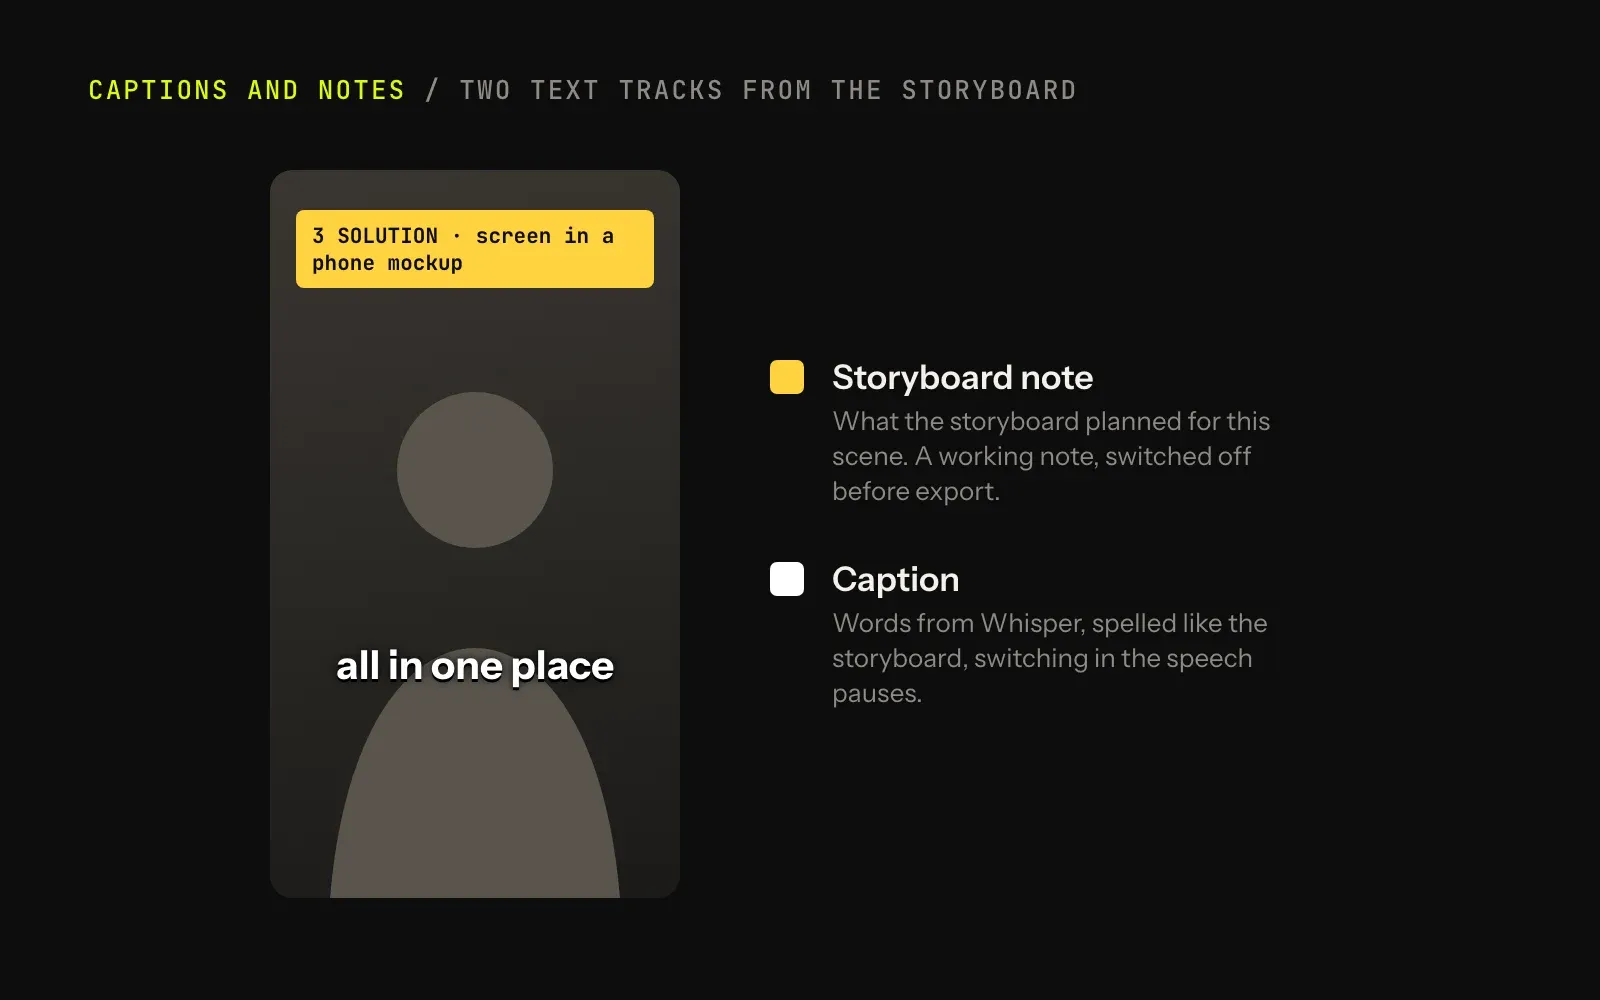
The captions copy their style from earlier ads. The words come from Whisper, spelled the way the storyboard spells them, two to five words at a time, and each caption switches during a pause in the speech. Wherever the spoken text differs from the script, Claude adds the spot to a list for me to listen to. Above the captions sits a separate track of yellow notes that say what the storyboard planned for each scene, like a screen, a graphic or a camera direction. They’re only there while editing and get switched off before export.
The fine cut stays by hand
1. Fine cut (human made)
From here I take over again: swapping takes, tightening cuts, adding a music bed and sound effects, setting levels (voice around −3 to −8 dB, music around −20 to −25) and checking everything against the platform’s safe zone. The music stays low enough to leave the voice clear, and a sound effect only stays if it lands on a beat or a transition.
Most of what gives an edit its feel never makes it into the storyboard: how long a look holds, where a pause turns into a beat, when the music comes in or drops away. Two editors can start with the same script and the same green takes and still end up with two different films. That’s where an edit gets a point of view, and over time a recognisable style, so it’s the part I want to keep doing myself.
2. Captions on the new cut
Once the fine cut is done, the captions no longer line up with the new cut, so Claude moves only the caption track onto it. The tricky part is speed: in the fine cut some clips may have been set to play a little faster, for example at 1.05×, and if Claude misses a single speed-up, the captions are a full second off after about 20 seconds. So it takes every speed change into account and checks the sound under each caption again at the end.
3. Animations
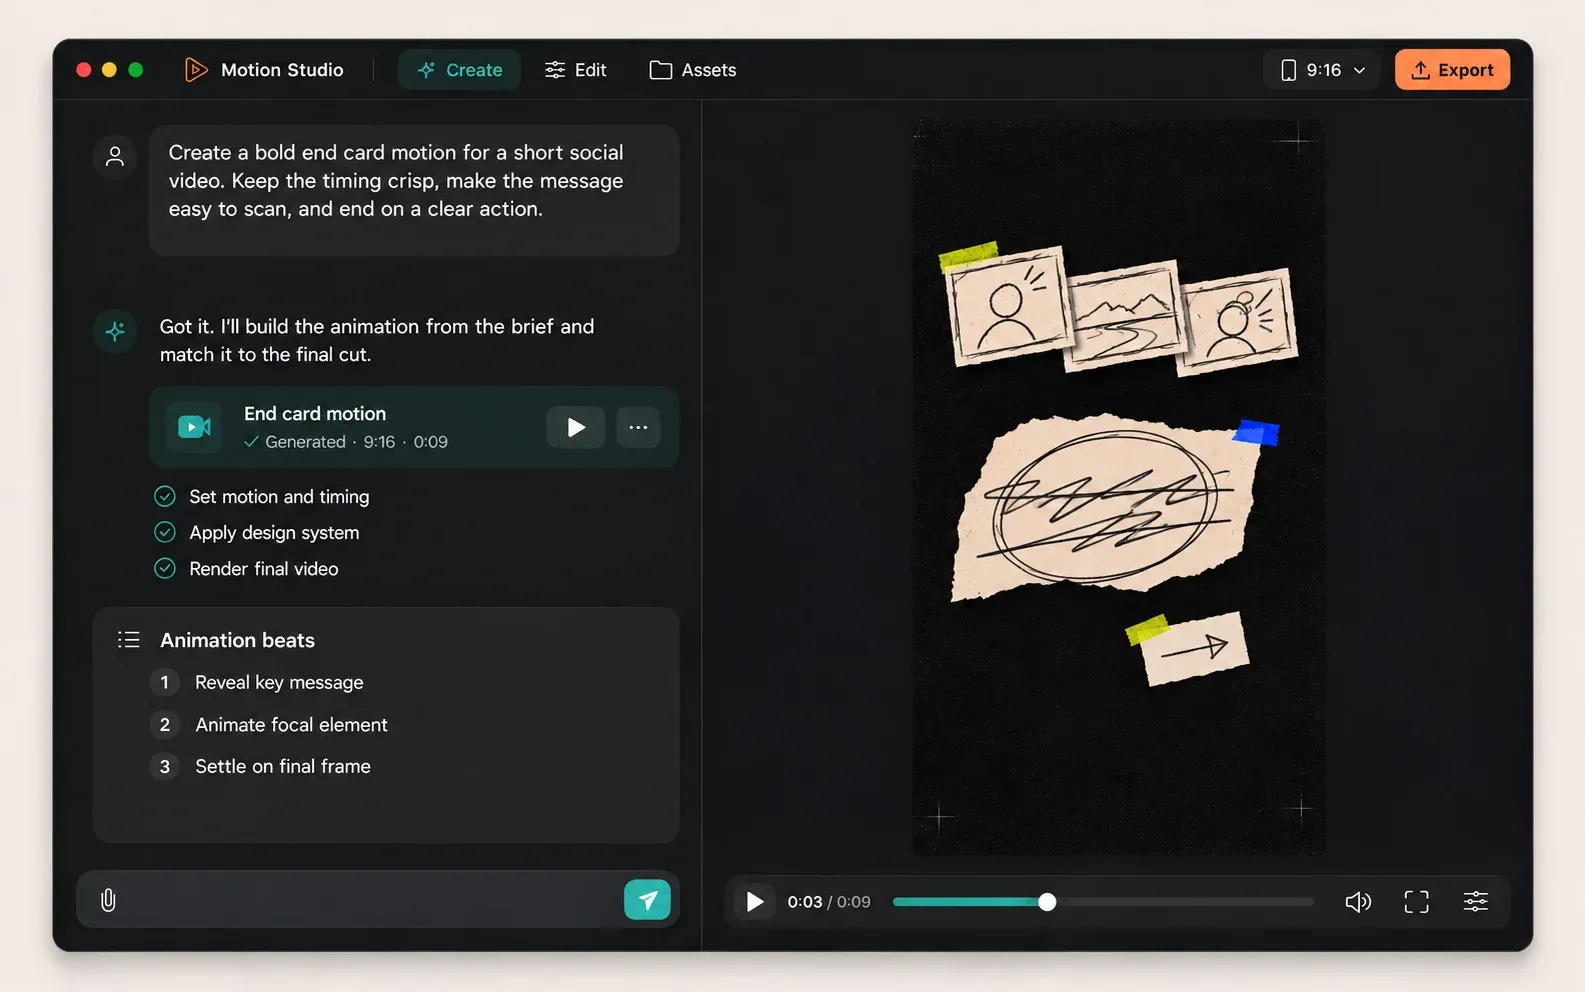
Animated scenes, like end cards or product screens, get a briefing that Claude writes from the storyboard and the measured cut. I build them in Claude Motion and drop them into CapCut at the end. The brief carries the measured duration, the visual hierarchy and the animation beats, so the animation fits the rhythm of the cut.
Learnings and suggestions
What helped most were a few decisions made early. They give the repetitive work a structure, so I have more attention left for the choices that need a person.
- Write the full speaker text into the storyboard. Claude needs it to match each take to its scene.
- Shoot with the edit in mind. Clear pauses, a close mic and spoken directions make the raw material much easier to read later.
- Test the workflow on a short file first. A few minutes are enough to calibrate volume thresholds, filenames and project structure before running it on an hour of footage.
- Keep the rough cut rough. Use it to check the story and find the right takes, then let the fine cut set the rhythm and style.